

Less than a decade ago it was difficult for an engineer to get ahold of a development board without doing some serious damage to their pocketbook. Development boards were produced in small quantities and were usually big and bulky. It was not uncommon to have to shell out at a minimum $500 for a decent development kit and in some cases upwards of $1000! Thankfully this is a thing of the past and today each vendor has their own unique spin on low cost development kits that rarely reach the $50 mark.
The first board that will be examined in this series is the Freescale Freedom board based on the Kinetis-L KL2x series. The development kit can be purchased from any number of suppliers for the miniscule price of $12.95. This development kit is based on the MKL25Z128VLK4 microcontroller which has some impressive stats. First, it is based on the ARM Cortex-M0+ core which is a 32 bit core targeted for low power applications. This part could easily replace devices that would be used in 8 or 16 bit applications. The system clock is capable of a maximum frequency of 48 MHz which has become the norm for this class of microcontroller.
On the more exciting side of the hardware, the microcontroller has the capability to store up to 128 kB of flash and has 16 kB of SRAM onboard! The microcontroller also has a plethora of peripherals such as USB OTG, PWM’s, UARTs, SPI, I2C, analog and other digital interfaces. The development kit has an on-board programmer in addition to a 3-Axis accelerometer, tri-color led and capacitive touch sensor. One of the features that is extremely useful about this development kit is that the expansion headers match the Arduino shield standard! This means that there are a plethora of expansion boards ready to be plugged into the board and for experimentation to begin!
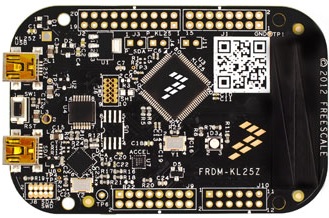 Figure 1 – The FRDM-KL25Z Development Board
Thankfully there is a lot of software support for this development board as well. The board uniquely comes with a build-in USB mass storage device boot-loader. Loading a program is as easy as plugging it in and copying the program image to the “thumb drive” that appears. A simple power cycle starts the new application running.
There is also support for other applications such as running the onboard PE Micro OpenSDA debugger to step through and debug the application code. (Just in case you can’t write perfect code the first time through). The freedom board is supported by mbed as well. Mbed is a web-based SDK which includes reusable software libraries, tools, compiler and even an online community for help. These tools definitely help speed up creating proof-of-concepts and getting some familiarity with the microcontroller.
It certainly isn’t a requirement to use these available tools and libraries. Companies and firmware engineers most likely have already developed API’s and coding standards that they would prefer to adhere to either due to personal preference or based on the level of quality and robustness required in the code. In these cases it is certainly possible to develop drivers and libraries in any of the standard compilers available such as IAR or Keil for example. The author has even put together some example drivers and source that can be used to experiment with the freedom development platform in this way. Any developers that might be interested can download the material from https://beningo.com/index.php/design-articles/tools/169-freescale-kinetis-l-framework-example.html.
There are certainly nearly an infinite number of possible applications that this development board can be used for. The possibilities are of course only limited to the developers’ imagination. The low power capabilities of this board make it perfect for low power sensor applications. There is already an accelerometer on board which could be used for any number of applications. Adding a Bluetooth or Zigbee radio to the expansion area could provide wireless transmission of data. Expand the board even further by adding weather or medical sensors. The options are nearly endless.

Figure 2 – A bread boarded SPO2 Sensor
Figure 2 shows how the author used the freedom board to interface hardware for an SPO2 sensor to the development kit. The SPO2 sensor allows the blood oxygenation percentage of a person to be measured by measuring the differences in the absorption of infrared and red light. The neat thing about it is that it also can be used to provide a person’s heart rate!
The whole point of a development kit is of course to learn about a microcontroller and prototype out a system that would eventually (hopefully) go to production. It allows a developer to quickly build and test a concept and if it doesn’t work move on to something else. If it does work though the engineer can then move from the concept stage of development boards to a production intent design that is compacted! Take for example the SPO2 sensor consisting of a credit card sized freedom board and a book sized bread board. Figure 3 shows how this proof-of-concept was then combined into a single SPO2 module the size of a quarter! The module is connected to a break-out board in order to easily connect to signals of interest.
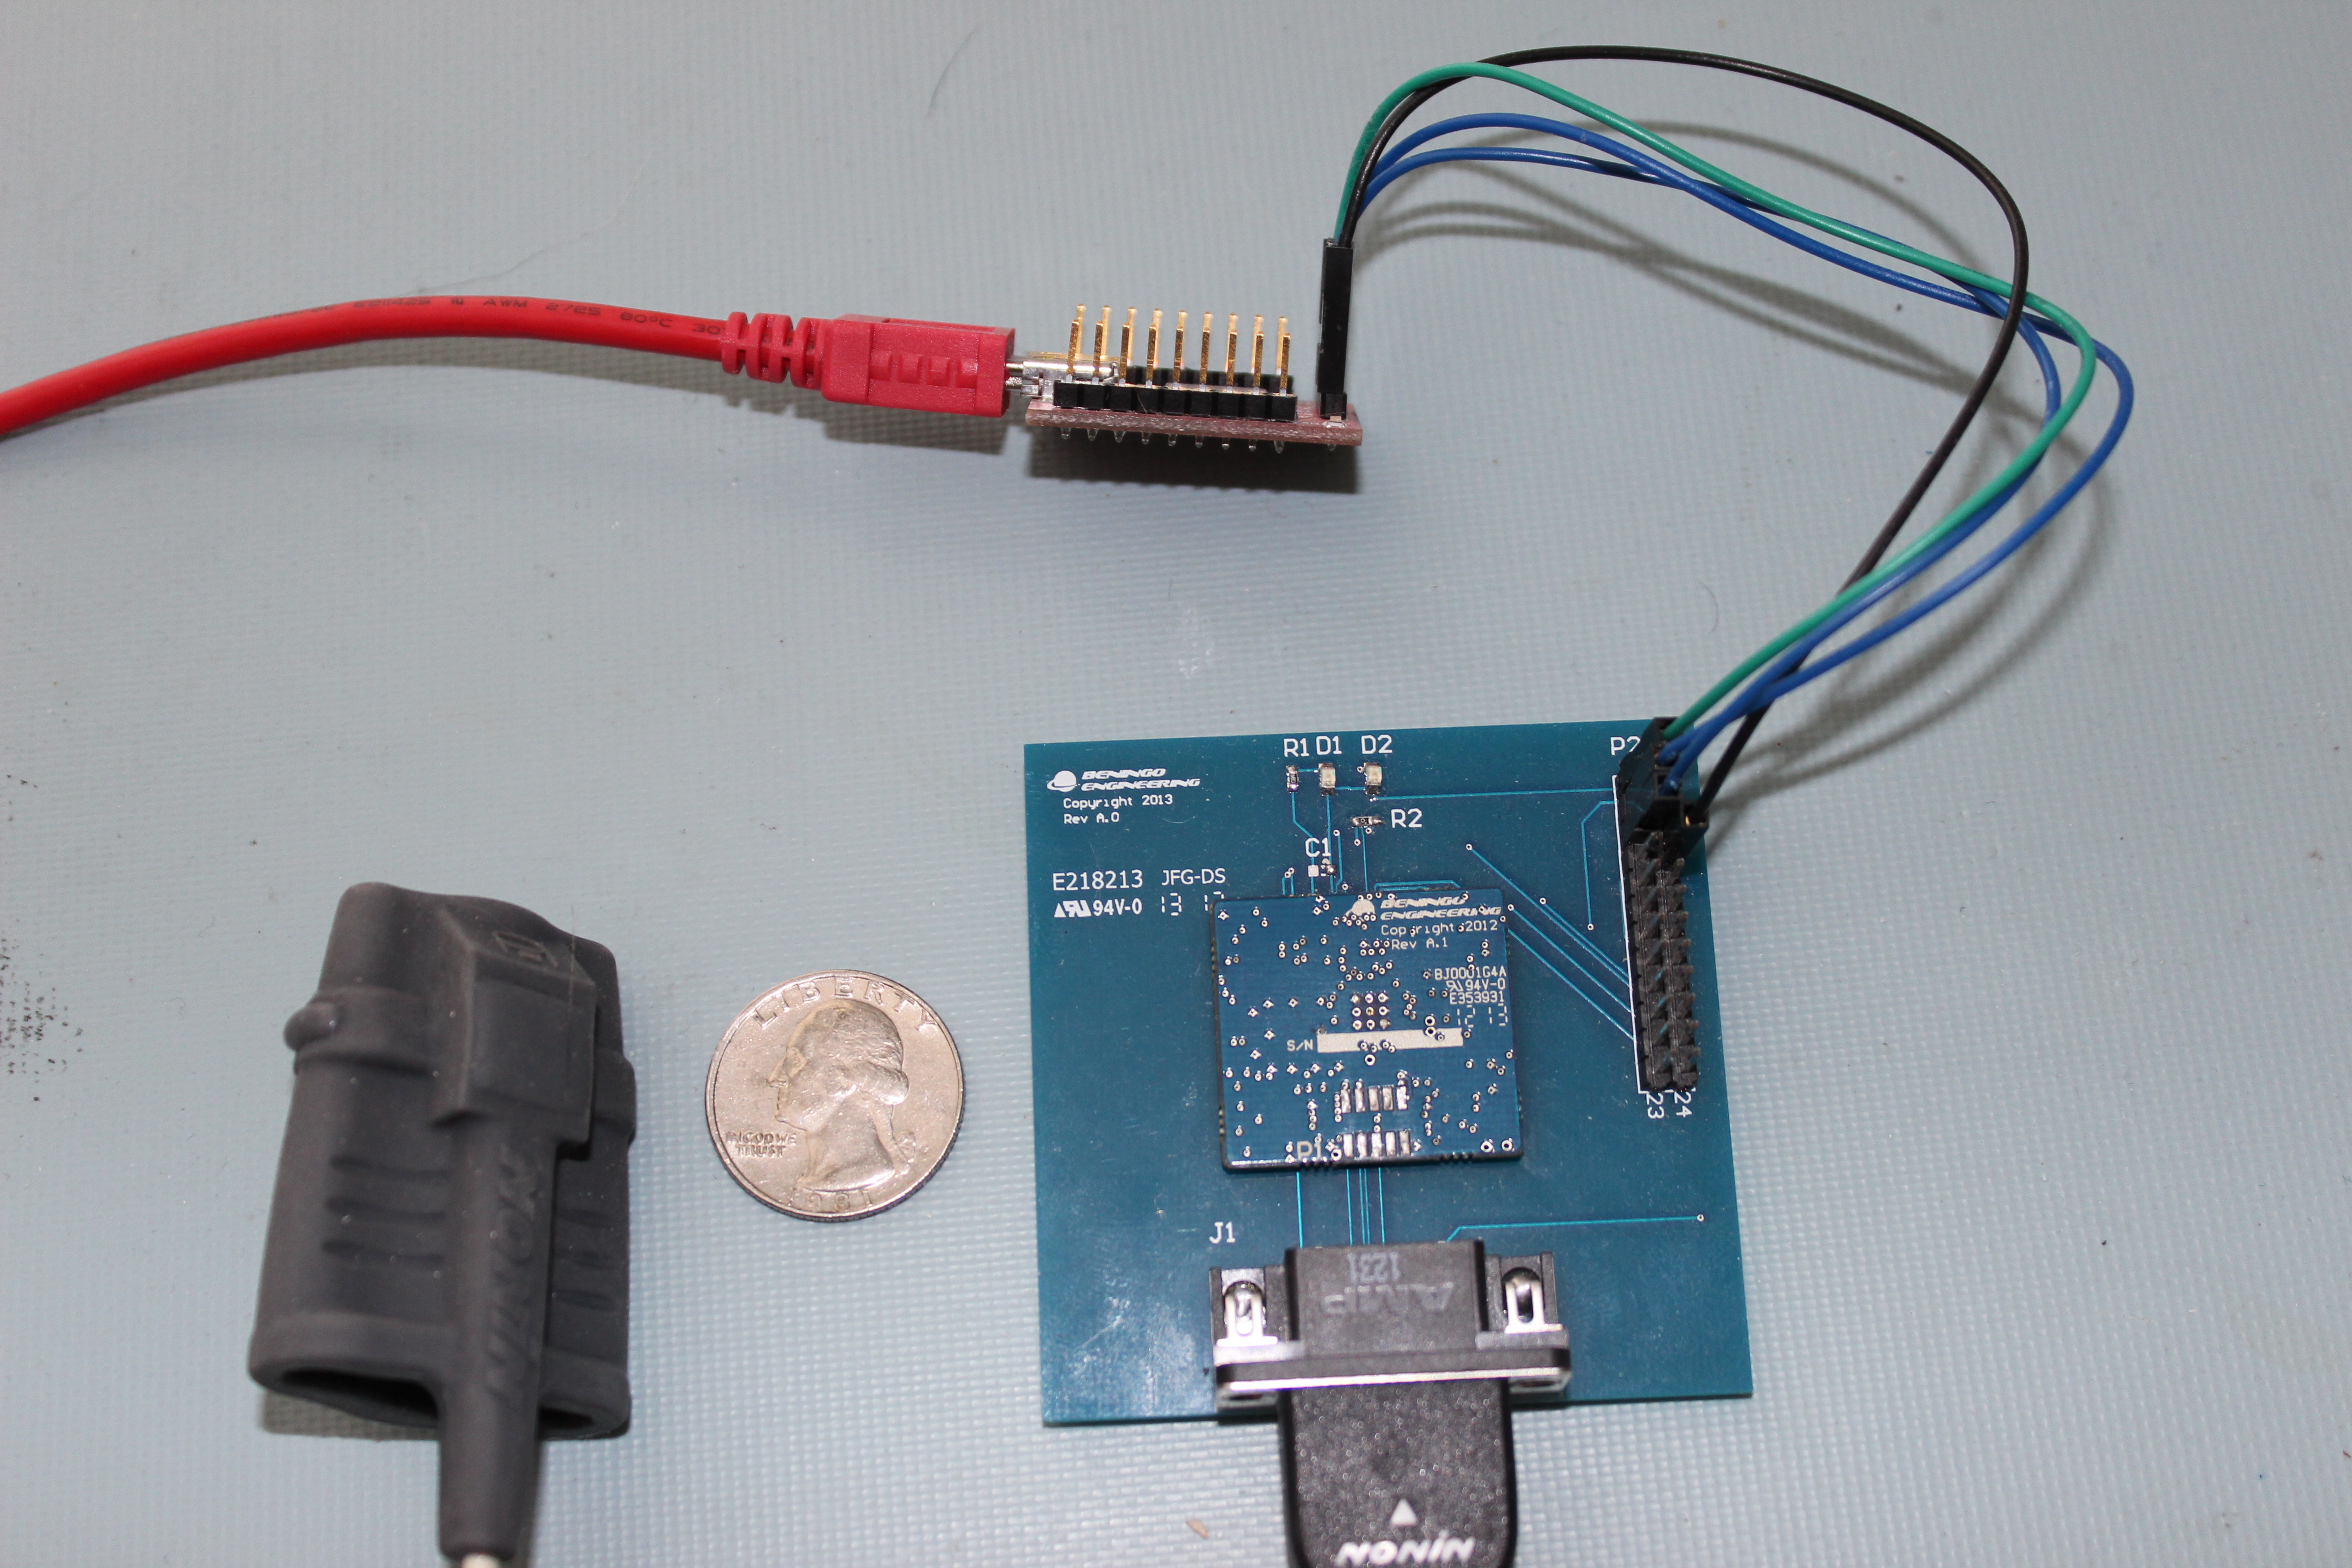
Figure 3 – SPO2 Module with breakout board
Low cost development kits have changed the way in which hardware and software are designed. They’ve decreased the cost of developing a proof-of-concept and allowed engineers to experiment and improve the quality of the products that are developed. These low cost development kits aren’t just providing engineers with better tools but also enabling hobbyists to experiment with embedded systems and developing their own devices. In the coming posts a look at additional development boards such as the STM32 L1 Discovery board will be explored.


